
Sunday, May 14, 2006
Thing you call sharpening...

This was my primary photo at friendster like a year ago. I did some sharpening using the high pass filter and choose the soft blending so the image is kinda contrasty...heheheh! you can choose overlay though and dont forget to adjust the opacity :D
Wednesday, May 10, 2006
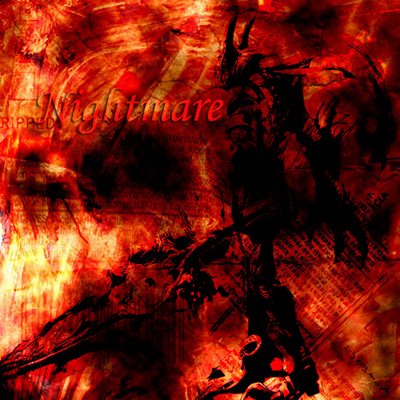
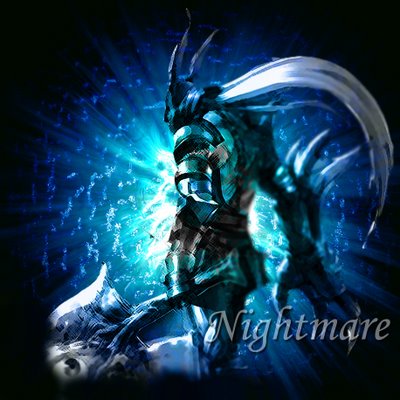
Deviant Art for game characters...
Since I am a soul calibur fanatic (I play too much arcade)...I decided to play some of Nightmare's photo at photoshop..teehee! I had two variations, the other is the grundge theme and the other one is the wateryhole kinda theme. Did something with the layers and tinker around the contrast, blending modes and opacity.
4 Comments:


Image inside text
I got this tutorial at www.pixel2life.com and its pretty interesting. You can put text in your image in a most easiest way possible. So, here goes nothin'...
1. Start by opening a photo that you want to put your text in. So choose this pic...courtesy of shutterstock.
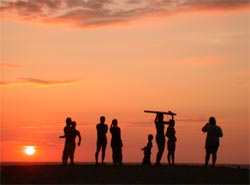
2. Choose the "Horizontal Type Tool", type in your text and place to which part of the picture you want to put it.
3.Right click on the text layer and choose "create work path".
from this point on...you can skew, scale and generally alter the way the text is place before you embed it to the photo.
4. Choose the "Pen tool", right click and select "Make Selection"

5. Delete the text layer, and without deselecting go to “Layer” -> “New” -> “Layer via Copy” (Ctrl-J)
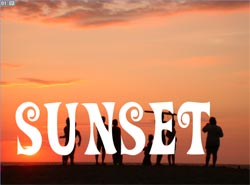
You can now delete the photo layer as well. You should now have your text with your image within it on a transparent background ready to be used for your designs.
If you want you can apply different blending modes to it. Here is my final result with a simple stroke.

0 Comments:
1. Start by opening a photo that you want to put your text in. So choose this pic...courtesy of shutterstock.

2. Choose the "Horizontal Type Tool", type in your text and place to which part of the picture you want to put it.

3.Right click on the text layer and choose "create work path".

from this point on...you can skew, scale and generally alter the way the text is place before you embed it to the photo.
4. Choose the "Pen tool", right click and select "Make Selection"
5. Delete the text layer, and without deselecting go to “Layer” -> “New” -> “Layer via Copy” (Ctrl-J)
You can now delete the photo layer as well. You should now have your text with your image within it on a transparent background ready to be used for your designs.
If you want you can apply different blending modes to it. Here is my final result with a simple stroke.

Photo Retouching
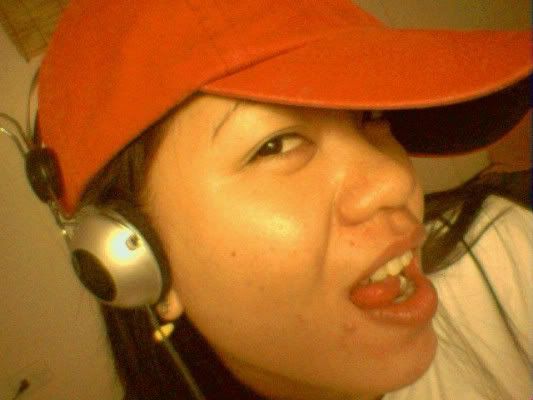
GASP! (*me in total shock)...teehee! I made a very productive discovery today. I stumbled upon a photoshop tutorial and its REEEAAAALLLLLY interesting. I was like yo! this is really dopey...I get to retouch my photos and put some kutzpah on my gorgeous self. If you peeps got a very BAD picture with those hideous pimples, blemishes and scars on yah face? then...HAVE NO FEAR!!! Photo retouching is here to bust those icky, too mundane things on yah face. I will provide with instructions on how to do PHOTO RETOUCHING...Alrayteh then...Let's get this thing started.
1. Open the photo that you want to retouch...so in this case, I use my own picture as a sample...
2. From the toolbar, select the history brush. Duplicate the photo. Make sure the original is untouched...I prefer it that way.
3. After that, you go to the filter menu, drag the cursor to noise then under noise choose median.
4. When the median dialog box shows up, drag the the slider until you see the picture goes soft. The photo will look blurry but we will do something about that later on so its no biggie. Set the radius to 20 pixels.
It will look something like this...
5. Go to the history palette (its on the actions window). Select the small square next to the median to set the history brush. After that, you go to the edit menu and click the "step backward". At this point, you are on the duplicate layer.
6. This is where the fun starts...you choose a medium, soft brush and then paint it all over the face...I tell yah guys, you will be giggling with excitement on what you are going to see...teehee! be careful not to include the edges of the face parts such as nose, mouth, eyes and head.
You can resize your brush size, change the mode and opacity when you feel like it...just be smart with your options :D
OKAY! for the results...
BEFORE
AFTER

See the difference??!! wahahahahhaha! lemme know if you guys tried this effect on photoshop...weeeeeeeeeeeeee!!!
1 Comments:
1. Open the photo that you want to retouch...so in this case, I use my own picture as a sample...
2. From the toolbar, select the history brush. Duplicate the photo. Make sure the original is untouched...I prefer it that way.
3. After that, you go to the filter menu, drag the cursor to noise then under noise choose median.
4. When the median dialog box shows up, drag the the slider until you see the picture goes soft. The photo will look blurry but we will do something about that later on so its no biggie. Set the radius to 20 pixels.
It will look something like this...
5. Go to the history palette (its on the actions window). Select the small square next to the median to set the history brush. After that, you go to the edit menu and click the "step backward". At this point, you are on the duplicate layer.
6. This is where the fun starts...you choose a medium, soft brush and then paint it all over the face...I tell yah guys, you will be giggling with excitement on what you are going to see...teehee! be careful not to include the edges of the face parts such as nose, mouth, eyes and head.
You can resize your brush size, change the mode and opacity when you feel like it...just be smart with your options :D
OKAY! for the results...
BEFORE
AFTER
See the difference??!! wahahahahhaha! lemme know if you guys tried this effect on photoshop...weeeeeeeeeeeeee!!!
![]()
